INDIGO DYEING : Questions & Answers
Some of the questions on this page are specific to indigo dyeing using our Indigo & Shibori Natural Dye Kit, but many are applicable to indigo dyeing more broadly!
Your dye kit comes complete with a load of supplies and materials that you can use to make designs on fabrics. Some parts of the process are complex and we may not have had room in the printed instructions included to go in depth.
If you have a question that has not yet been answered to your satisfaction, ask away!

USE KEYWORDS TO SEARCH FOR ANSWERS TO YOUR QUESTIONS
The following is an index list of each Question and Answer title, click on the title to read the corresponding Q&A, or simply use search terms in the search box above to see if your question has been answered!
-
DIP TECHNIQUE
- Jul 26, 2023 Avoiding Fading
- Jul 26, 2023 Dipping Resist Pieces
- Jul 26, 2023 Maintaining Your Whites While Rinsing
- Jul 25, 2023 Dyeing Over Multiple Days
- Jul 25, 2023 Avoiding Sediment
- Jul 25, 2023 How Sediment Affects Your Dyeing and the Importance of Proper Rinsing
- Jul 25, 2023 Tips for Using Rice Paste in a Ferrous Vat
- Jul 25, 2023 Tips for Getting the Darkest Blues
- Jul 25, 2023 Suggestions for Uneven Coloration
- Jul 25, 2023 Rinsing Stencil Print Between Dips
- Jul 25, 2023 Number of Dips for Different Shades of Indigo
- Jul 20, 2023 Avoiding Sediment in the Ferrous Indigo Vat
-
DYE GARDEN QUESTIONS
- Jul 26, 2023 Starting Indigo Seeds Indoors Versus Outdoors
- Jul 25, 2023 When to Plant Indigo Seeds
- Jul 25, 2023 Indigo Seed Propagation
-
GENERAL INDIGO DYEING QUESTIONS
- Jul 26, 2023 Calculating Amount of Indigo Needed
- Jul 25, 2023 Dyeing Protein Fibers in a Natural Indigo Vat
- Jul 25, 2023 Dyeing Stretch Fabric with Natural Indigo
- Jul 25, 2023 Ferrous Vat Longevity
- Jul 25, 2023 Shelf Life of Natural Indigo and “Pasting-Up” Your Powder
- Jul 25, 2023 Toxicity of Indigo and Indigo Dyeing
- Jul 25, 2023 Indigo and Splatter Dyeing
- Jul 25, 2023 Indigo and Cotton Velveteen
- Jul 25, 2023 Indigo and Polyester
- Jul 25, 2023 Over-dyeing with Indigo
- Jul 25, 2023 Is Indigo Dye Okay for Sensitive Skin, Is it Safe Enough to use on Baby Clothes?
- Jul 25, 2023 Light and Pale Shades of Indigo
- Jul 25, 2023 Fixing Indigo Onto Fabric
- Jul 25, 2023 Materials and Fabrics Suitable for Indigo Dyeing
- Jul 25, 2023 Disposing of a Ferrous Indigo Vat
- Jul 25, 2023 Large Container e.g. Trash Can Vat
- Jul 20, 2023 Dye Vat Capacity
-
INDIGO LEAF EXTRACTION
- Jul 25, 2023 Making a Ferrous Vat with Fresh Indigo Leaves
- Jul 25, 2023 Clarification on Indigo Extraction
-
INDIGO VAT TIPS & TROUBLESHOOTING
- Jul 26, 2023 Is the Fermentation Vat the Best Vat?
- Jul 26, 2023 Indigo Vat Troubleshooting: No Longer an Odor
- Jul 26, 2023 Indigo Vat Troubleshooting: Dark Blue Vat
- Jul 26, 2023 Indigo Vat Troubleshooting: Greenish Tint
- Jul 26, 2023 Avoiding Fading
- Jul 26, 2023 Waiting 24 Hours Between Mixing and Using Your Indigo Vat
- Jul 26, 2023 Quantity of Indigo Paste in a Vat
- Jul 26, 2023 Making a Long Term Vat
- Jul 25, 2023 Indigo Flower Comes and Goes
- Jul 25, 2023 Using Pencil to Make Marks on Fabric - Does Graphite Affect the Vat?
- Jul 25, 2023 Under-Reduced Fructose Vat
- Jul 25, 2023 Troubleshooting a Different Vat Recipe
- Jul 25, 2023 Avoiding Sediment
- Jul 25, 2023 Indigo Vat Troubleshooting: Recipe Quantities for a Large Vat
- Jul 25, 2023 Sharpening Your Vat
- Jul 25, 2023 Stirring Your Vat
- Jul 25, 2023 Adding More Pigment to a Fresh Leaf Extraction Vat
- Jul 25, 2023 Making a Vat for Pale Dyeing
- Jul 25, 2023 Sizing Up Your Vat
- Jul 25, 2023 Indigo Vat Troubleshooting: Lye and Hydrosulfite
- Jul 25, 2023 Recipe for Pickling Lime and Fructose Vat
- Jul 25, 2023 Thoughts on Using Soda Ash and Spectralite Instead of Iron and Lime in Making a Dye Vat
- Jul 25, 2023 Giving Your Vat Enough Time to Set Up
- Jul 25, 2023 Switching Reducing Agent and pH Combo When Sharpening Your Vat
- Jul 25, 2023 Vat Temperature
- Jul 25, 2023 Precision of pH for Ferrous and Fructose Vats and Indicators of Under or Over Reduction
- Jul 25, 2023 Forms of Indigo that Work in a Ferrous Vat Recipe
- Jul 25, 2023 Indigo Vat Troubleshooting: Sludge and Sediment
- Jul 25, 2023 Indigo Vat Diagnosis: Vat Color, Flower, and pH
- Jul 25, 2023 Iron Vat Temperature
- Jul 25, 2023 Dissolving Lime in an Indigo Vat
- Jul 25, 2023 Reviving a spoiled or 'oxidized' indigo dye vat
- Jul 25, 2023 Mixing and Combining New Vat Ingredients with Old or Spent Vats
- Jul 25, 2023 Indigo Vat Mixing Temperature
- Jul 25, 2023 Weak Vat, Old Vat and Vat Health Restoration
-
PRE AND POST-DYE TREATMENTS & TIPS
- Jul 26, 2023 Preventing Crocking and Dyeing Large Fabrics Like Bedding
- Jul 26, 2023 Avoiding Fading
- Jul 26, 2023 Rinsing in Still Versus Running Water
- Jul 25, 2023 How Sediment Affects Your Dyeing and the Importance of Proper Rinsing
- Jul 25, 2023 Troubleshooting Strange Fading Patterns and Discoloration
- Jul 25, 2023 Suggestions for Uneven Coloration
- Jul 25, 2023 Fabric Drying Stiff and Crispy Post-Dyeing
- Jul 25, 2023 Indigo Post-Dye Rinse: Purposes and Options
- Jul 25, 2023 Protecting Your Indigo-Dyed Pieces From Fading: Proper Scouring and Soy Milk Treatment
- Jul 25, 2023 Sun Fading of Indigo
- Jul 20, 2023 Best Way to Dry Indigo Dye
-
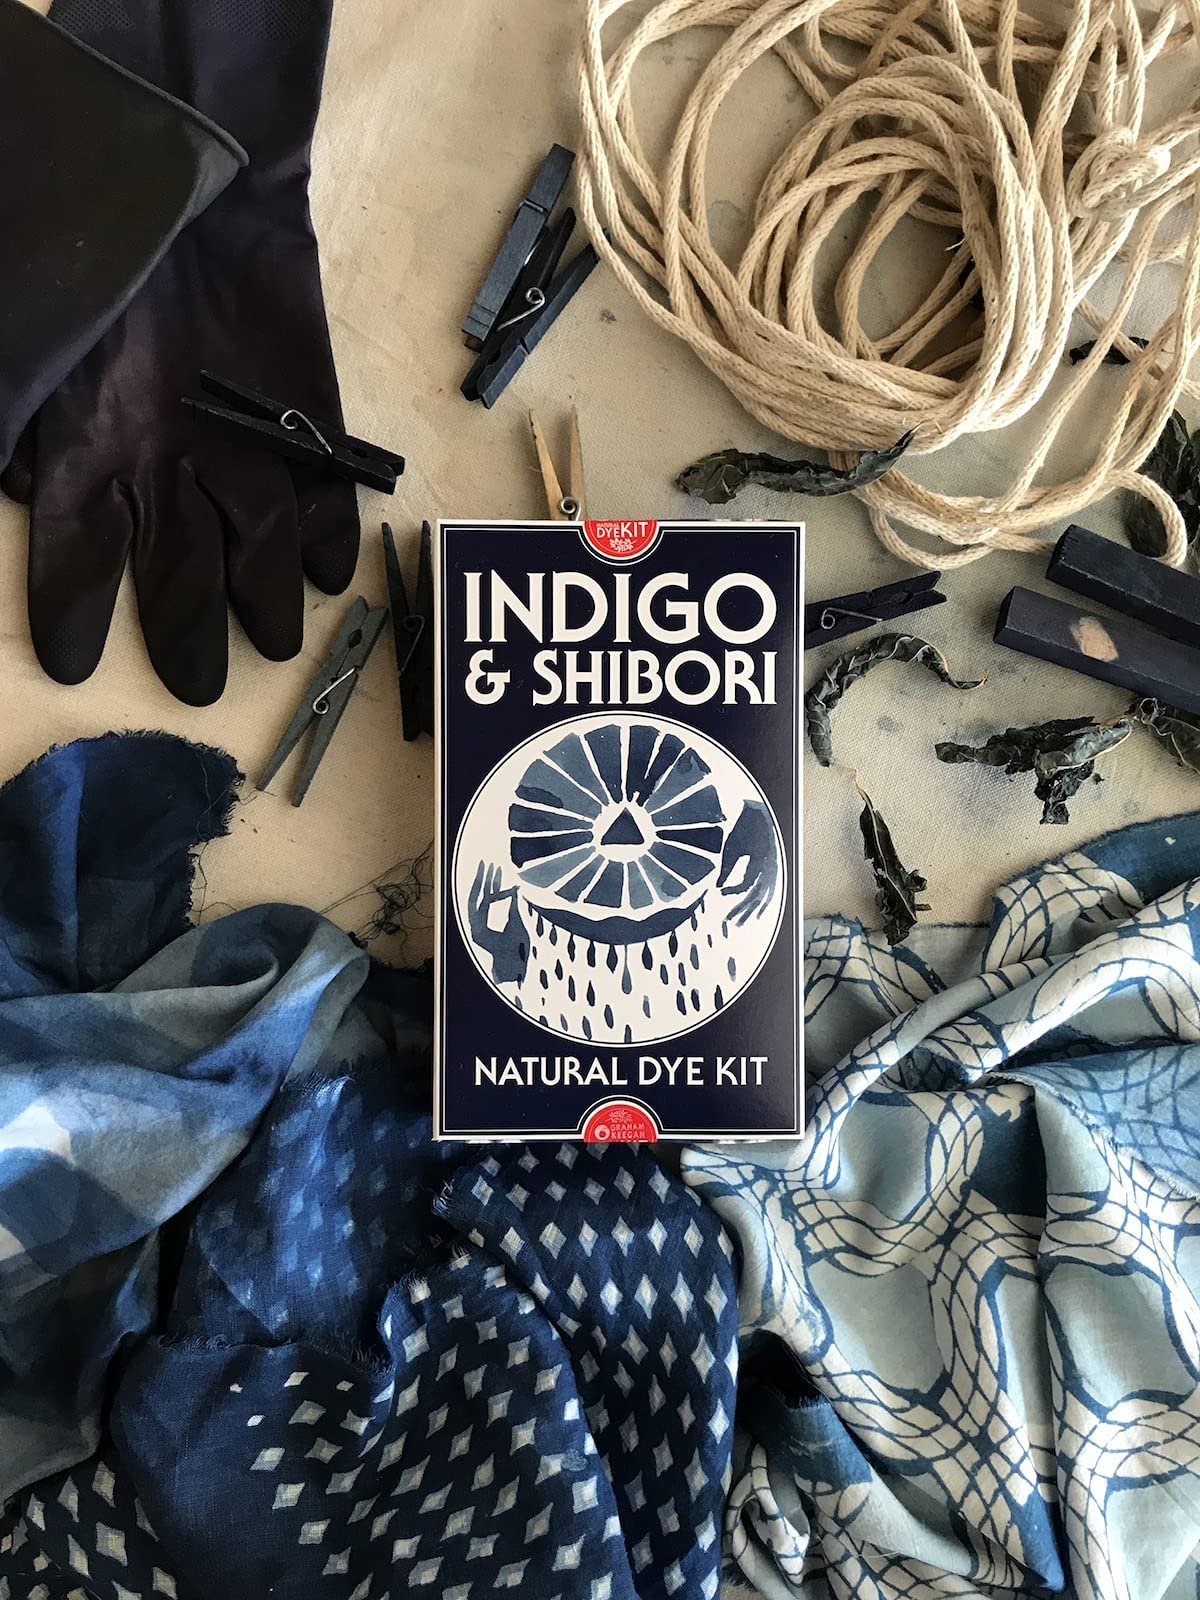
QUESTIONS ABOUT OUR INDIGO & SHIBORI DYE KIT
- Jul 26, 2023 Waiting 24 Hours Between Mixing and Using Your Indigo Vat
- Jul 25, 2023 Scaling Down Vat Size
- Jul 25, 2023 How Much Fabric Will the Natural Indigo & Shibori Dye Kit Dye?
- Jul 25, 2023 Ferrous Vat Longevity
- Jul 25, 2023 Components in the Natural Indigo & Shibori Dye Kit
- Jul 25, 2023 Indigo Form in the Natural Dye Kit
- Jul 25, 2023 Indigo Kit and Dyeing Large Items
- Jul 25, 2023 Light and Pale Shades of Indigo
- Jul 25, 2023 Scent of Natural Indigo
- Jul 20, 2023 Dye Vat Capacity
-
RICE PASTE
- Jul 26, 2023 Dipping Resist Pieces
- Jul 26, 2023 Pastry Cones for Applying Rice Paste Resist
- Jul 26, 2023 Indigo Resist Screen Printing
- Jul 26, 2023 Rice Paste Resist Longevity
- Jul 26, 2023 Destabilized AKA De-Fatted Bran in Rice Paste Resist
- Jul 25, 2023 Tips for Using Rice Paste in a Ferrous Vat
- Jul 25, 2023 Rinsing Stencil Print Between Dips
-
TIPS FOR VARIOUS DYE PROJECTS
- Jul 26, 2023 Preventing Crocking and Dyeing Large Fabrics Like Bedding
- Jul 26, 2023 Using Fresh Goldenrod Leaves to Make a Paintable Dye Pigment
- Jul 26, 2023 Type of Wood for Making Block Prints
- Jul 26, 2023 Mordant Recipe: Block vs Screen Printing
- Jul 26, 2023 Making a Stamp Pad
- Jul 26, 2023 Dyeing with Fresh Plants
- Jul 26, 2023 Indigo Resist Screen Printing
- Jul 26, 2023 Destabilized AKA De-Fatted Bran in Rice Paste Resist
- Jul 25, 2023 Dipping Metal in my Vat
- Jul 25, 2023 Using Natural Indigo Paste
- Jul 25, 2023 Dyeing Vegetable Tanned Leather
- Jul 25, 2023 Tips for Using Rice Paste in a Ferrous Vat
- Jul 25, 2023 Dyeing Paper
- Jul 25, 2023 Chalk and Cheesecloth Clarification in Mordant and Block Printing
-
USING MORDANTS
- Jul 26, 2023 Mixing Mordant
- Jul 26, 2023 Mordant Recipe: Block vs Screen Printing
- Jul 26, 2023 Diluting Mordant Paste
- Jul 25, 2023 Chalk and Cheesecloth Clarification in Mordant and Block Printing
Preventing Crocking and Dyeing Large Fabrics Like Bedding
Q: How do I prevent indigo dye from rubbing off onto other surfaces when the fabric is subjected to abrasion? My daughter dyed some bedding with a very similar kit and over time it left blue in our dryer and stained some other bedding/clothing.
A: Great question! Also, the tendency of a dyed fabric to give off color when the surface is rubbed is called crocking. Bedding is notoriously challenging to dye well in home use kits! Every sheet or duvet cover or whatever is just so much material that it often overwhelms the activity of the vat and causes the vat chemistry to become oxidized and the indigo becomes under-reduced which causes poor color uptake into the fabric. This leads to more crocking of your goods.
Also, large items will inevitably stir up whatever sediment exists at the bottom of the vat which can also 'clog' (for lack of a better term) the fabric which will also lead to poor and uneven color uptake.
I mostly dye indigo in a 50 gallon vat - and that can handle sheets and larger yardage panels but even I don't dye them often! Sheets are a great place to practice some larger folded patterns though. And they're much easier to dye when folded into bundles. I recommend keeping the total number of layers of the material under 25 otherwise you just end up with a LOT of white area.
My recommendation for optimizing color uptake on large items and avoiding crocking would be to pre-soak the goods in hot water prior to going in the vat with the addition of a little soda ash - say a tablespoon per gallon. This alkaline water can really help wet out the fabric and will help keep the pH of the vat from shifting toward acidic.
Other than that, rinse rinse rinse prior to washing after dyeing. And I always wash indigo goods alone on their first laundering. Also I never wash in a front loading washer with the tight seals. Those can actually create and maintain a reduction environment which can discharge some color from the piece during the cycle. I wash all my indigo goods in a top loader on the gentle setting with detergent.
There are also soy coatings made from fresh bean soy milk that can be added onto fabric after dyeing to essentially seal in the indigo but those require ageing and oxidizing (for at least a few weeks) before washing. They act as a transparent protective later. I hope to post more about that soon. John Marshall covers that process in his book Singing the Blues - shameless plug - which is available on my website www.grahamkeegan.com
Using Fresh Goldenrod Leaves to Make a Paintable Dye Pigment
Q: How can I make a paintable dye pigment from goldenrod leaves?
A: You will want to fill a pot with your fresh goldenrod leaves and top it up with water. Boil the water and leaves for about an hour. Then remove the leaves and boil off the excess liquid until the remaining concentrate is a syrupy consistency. From there, add in a pinch of cream of tartar and equal parts by volume of an alum mordant (100g vinegar, 20g alum sulfate, 10g soda ash, 1g guar). This mixture can be applied by brush or stencil. Rinse and fix after drying.
Type of Wood for Making Block Prints
Q: What kind of wood do you use for making block printing blocks?
A: The wood I usually use is balsa because it is so easy to carve. It isn't that strong and will break down about as quickly as foam would. You can use any kind of wood for carving, though make sure that you're carving into the end grain.
Mordant Recipe: Block vs Screen Printing
Q: Is the mordant recipe the same for screen printing as it is for block dyeing?
A: When screen printing with dyes I use the exact same mordant recipe that I use for block printing. If you want, you can thicken the print medium a little more to get it to behave better on the screen by adding about 50% more guar gum (the thickener).
Making a Stamp Pad
Q: I would like to try printing with blocks. Any tips on making a stamp pad?
A: I use a plywood block as the base and then set a thin (1/8-1/4") sponge on top of it, trimmed to fit exactly. Then I wrap that whole business in 60 or 80 mesh screen. It gives a much more even distribution of the print medium than cheesecloth.
Dyeing with Fresh Plants
Q: Any general tips for dyeing with actual fresh plants?
A: I've found it is best to work with simmering liquids, no need for vigorous boils. If its a leafy green plant, I'll heat the liquid first then add the greens and simmer for 20 minutes at least. Woody or root-y things, I'll simmer for an hour, then remove the dyestuff, keep the pots hot, but on low heat and make sure to keep agitating the fabric goods.
Indigo Resist Screen Printing
Q: I have some questions about indigo resist screen printing. What type of screen do you use? What density? And what types of resist are you using? I’ve seen the rice paste recipe on your website. Do you ever screen print with other resists like mud or flour/water?
A: For indigo resist screen printing I use a 40 mesh screen, create my designs with cut vinyl (make sure you get the stickiest kind) which I place on the bottom of the screen (the print side not the ink side) and print with a traditional Japanese rice paste recipe. You can use photo-emulsion for preparing the screen but I find that it tends to get pixelated when using 40 mesh, which is why I create my designs using adhesive vinyl. You can still get incredibly crisp lines and points when working with a very open mesh.
I've tried a couple mud recipes and found the rice paste to hold up much better over repeated dips. I've never tried wheat flour/water, just the rice flour/water. Just make sure to sieve your dry ingredients through a 60+ mesh screen to ensure that they all properly fit through a 40 mesh screen when you're printing. I've found that it is hard to find rice bran that is milled fine enough.
Destabilized AKA De-Fatted Bran in Rice Paste Resist
Q: Your recipe for making rice paste resist calls for de-fatted bran. Is that the same as stabilized bran?
A: I have seen the two terms used interchangeably. All the bran does is add fluff which makes the paste spreadable. The sweet rice flower adds the sticky.
Dipping Metal in my Vat
Q: I have come across some pieces of scrap metal that I would like to try to wrap my fabric around to see what kinds of patterns it might make when dipped in my indigo vat. Will the metal affect my vat? What if the metal has rust on it?
A: The metal will not affect the vat. If the metal has rust on it, the rust may transfer onto the fabric and make orange/brown stains. These stains can be removed with a simmer in citric acid.
Using Natural Indigo Paste
Q: Can I use your natural indigo paste for block printing on fabric or for use with stencils on fabric?
A: Natural indigo paste is a pigment but it needs a binder in order to adhere to fabric. If you were to apply it directly from the bottle to your fabric it would result in a temporary stain but then just wash right off. For the indigo to actually transfer and adhere to your fabric it must undergo a chemical transformation. Traditionally this is done by creating what is called a vat. You can find a wealth of information about creating a vat here: https://www.grahamkeegan.com/indigo-vat-basics.
Since natural indigo paste cannot be applied directly to fabric as a dye, pattern making is done by using resist on the fabric to keep the indigo from adhering to certain sections when you dip it into the dye vat. You can find some information about that specific process here: https://www.grahamkeegan.com/stencils-and-rice-paste.
Dyeing Vegetable Tanned Leather
Q: I heard it is hard to dye vegetable tanned leather with indigo. Is this true? I would like to try dyeing it with your kit but have no idea how it will turn out.
A: I actually have no experience with this, so have no comment except to say that one of the activating ingredients in my kit is ferrous sulfate, a water soluble form of iron. I’d expect that the tannins used to preserve the hide would react with the iron to form a grey black color if the hide comes in contact with the sediment in the vat.
Additionally, as a general matter, leather is a protein product and does not fare well at elevated pH (becoming brittle and cracking if left to dry in alkaline conditions). So, as a concept, I'd plan to rinse all leather pieces and re-establish a neutral or slightly acidic pH following each immersion into the dye bath so the leather does not dry out and crack from the alkalinity.
Tips for Using Rice Paste in a Ferrous Vat
Q: I am interested in making an iron vat for the first time and would like to do some stencil dyeing with rice paste. I see that you suggest rinsing the fabric after each dip but I am concerned that the rinsing will cause my rice paste to come off. Do I need to rinse between every dip? What is the purpose of rinsing?
A: I rinse between dips for a couple reasons: first, it helps to oxidize the indigo more quickly and thoroughly, second, it rinses off any sludge, sediment or flower that may be trapped on the piece or in the crevices which would act as a resist for future dips.
But you have good instinct. When stencil dyeing with rice paste, to ensure the paste does not rinse off, I generally do not rinse between dips unless my piece makes contact with the sediment at the bottom of the vat. If your piece does hit the sediment you WILL need to rinse.
Make sure you don’t crinkle/crumple your pieces to get them in the vat. Rice pasted pieces do best when dipped cleanly into the vat. Because of this, be sure to dye in a very deep vat so your fabric can hang freely in the liquid and not touch the sediment.
For dark results where you need to dip many times, stick to 2-3 dips per day so the rice paste has a chance to dry out and stay firm. I have also found that if I stick to 2-3 dips per day (only dipping once is the safest bet) I can get away with rinsing gently between dips and then giving the piece 24 hours to totally dry out before doing further dips. Rice paste stays pretty resilient as long as it does not get too hydrated which is partly why I prefer using rice paste to clay or other resists which wash off very easily. I’ve found it to be the most tenacious non-wax resist.
I should also note that while dyeing in a heated vat has superior results to dyeing in a cold vat, when dyeing rice pasted pieces a cooler temperature works better because a warm/hot vat will disintegrate the paste after a dip or two.
Dyeing Paper
Q: Any tips for using your indigo kit to dye paper?
A: I have no experience dyeing paper, so I can’t speak to that, but I do have some general tips. Soak your material first (if possible, are you using cotton rag?) as this will allow the dye to penetrate the paper properly and not just sit on top where it can be scratched off easily.
Longer dips will give you a more lasting, penetrating dye transfer.
Chalk and Cheesecloth Clarification in Mordant and Block Printing
Q: I am looking to try block printing and your article on mordant printing looks like a great place to start! In this article you reference using chalk but I’m not sure what exact material you mean when you say chalk. Also, is the cheesecloth meant to wrap the printing pad or the printing block?
A: When I make reference to chalk I am referring to Calcium Carbonate.
The cheesecloth is used to wrap around the print pad but really any open weave fabric will work. I’ve used everything from a loose weave rayon to silk screen fabric.