
INDIGO DYEING : Questions & Answers
Some of the questions on this page are specific to indigo dyeing using our Indigo & Shibori Natural Dye Kit, but many are applicable to indigo dyeing more broadly!
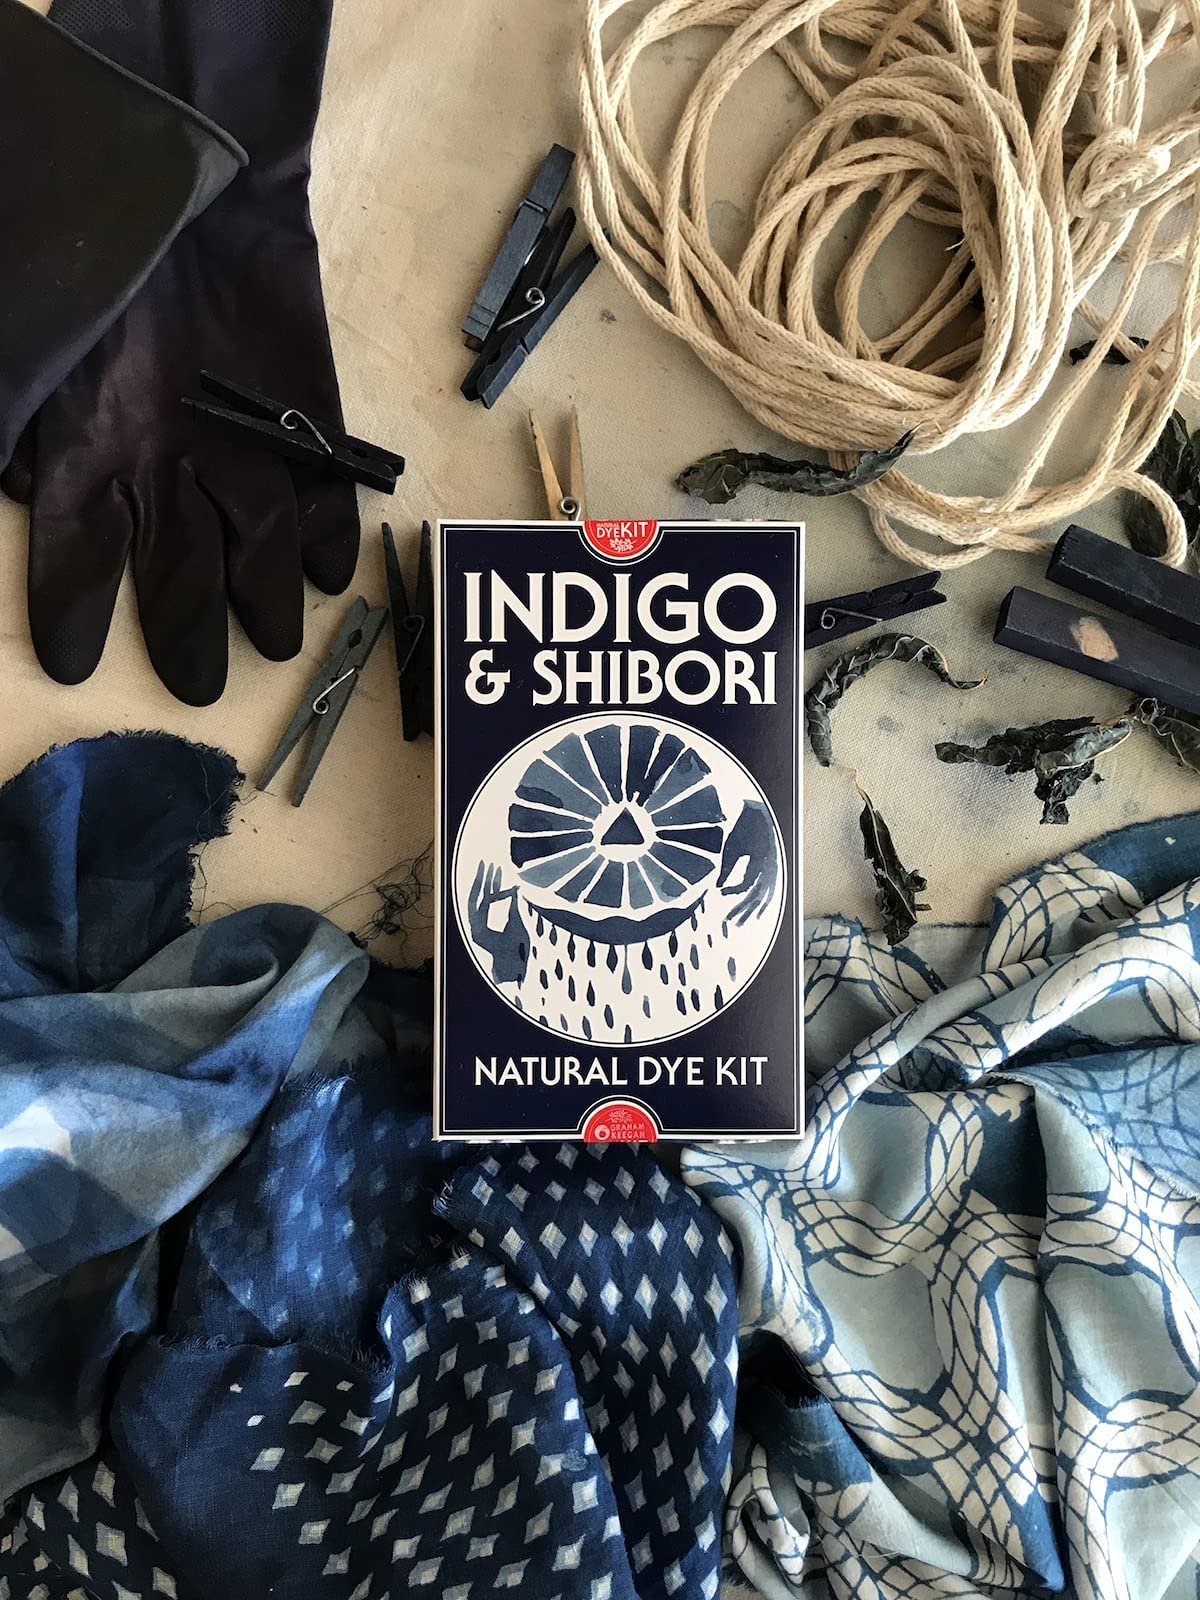
Your dye kit comes complete with a load of supplies and materials that you can use to make designs on fabrics. Some parts of the process are complex and we may not have had room in the printed instructions included to go in depth.
If you have a question that has not yet been answered to your satisfaction, ask away!

USE KEYWORDS TO SEARCH FOR ANSWERS TO YOUR QUESTIONS
The following is an index list of each Question and Answer title, click on the title to read the corresponding Q&A, or simply use search terms in the search box above to see if your question has been answered!
-
DIP TECHNIQUE
- Jul 26, 2023 Avoiding Fading
- Jul 26, 2023 Dipping Resist Pieces
- Jul 26, 2023 Maintaining Your Whites While Rinsing
- Jul 25, 2023 Dyeing Over Multiple Days
- Jul 25, 2023 Avoiding Sediment
- Jul 25, 2023 How Sediment Affects Your Dyeing and the Importance of Proper Rinsing
- Jul 25, 2023 Tips for Using Rice Paste in a Ferrous Vat
- Jul 25, 2023 Tips for Getting the Darkest Blues
- Jul 25, 2023 Suggestions for Uneven Coloration
- Jul 25, 2023 Rinsing Stencil Print Between Dips
- Jul 25, 2023 Number of Dips for Different Shades of Indigo
- Jul 20, 2023 Avoiding Sediment in the Ferrous Indigo Vat
-
DYE GARDEN QUESTIONS
- Jul 26, 2023 Starting Indigo Seeds Indoors Versus Outdoors
- Jul 25, 2023 When to Plant Indigo Seeds
- Jul 25, 2023 Indigo Seed Propagation
-
GENERAL INDIGO DYEING QUESTIONS
- Jul 26, 2023 Calculating Amount of Indigo Needed
- Jul 25, 2023 Dyeing Protein Fibers in a Natural Indigo Vat
- Jul 25, 2023 Dyeing Stretch Fabric with Natural Indigo
- Jul 25, 2023 Ferrous Vat Longevity
- Jul 25, 2023 Shelf Life of Natural Indigo and “Pasting-Up” Your Powder
- Jul 25, 2023 Toxicity of Indigo and Indigo Dyeing
- Jul 25, 2023 Indigo and Splatter Dyeing
- Jul 25, 2023 Indigo and Cotton Velveteen
- Jul 25, 2023 Indigo and Polyester
- Jul 25, 2023 Over-dyeing with Indigo
- Jul 25, 2023 Is Indigo Dye Okay for Sensitive Skin, Is it Safe Enough to use on Baby Clothes?
- Jul 25, 2023 Light and Pale Shades of Indigo
- Jul 25, 2023 Fixing Indigo Onto Fabric
- Jul 25, 2023 Materials and Fabrics Suitable for Indigo Dyeing
- Jul 25, 2023 Disposing of a Ferrous Indigo Vat
- Jul 25, 2023 Large Container e.g. Trash Can Vat
- Jul 20, 2023 Dye Vat Capacity
-
INDIGO LEAF EXTRACTION
- Jul 25, 2023 Making a Ferrous Vat with Fresh Indigo Leaves
- Jul 25, 2023 Clarification on Indigo Extraction
-
INDIGO VAT TIPS & TROUBLESHOOTING
- Jul 26, 2023 Is the Fermentation Vat the Best Vat?
- Jul 26, 2023 Indigo Vat Troubleshooting: No Longer an Odor
- Jul 26, 2023 Indigo Vat Troubleshooting: Dark Blue Vat
- Jul 26, 2023 Indigo Vat Troubleshooting: Greenish Tint
- Jul 26, 2023 Avoiding Fading
- Jul 26, 2023 Waiting 24 Hours Between Mixing and Using Your Indigo Vat
- Jul 26, 2023 Quantity of Indigo Paste in a Vat
- Jul 26, 2023 Making a Long Term Vat
- Jul 25, 2023 Indigo Flower Comes and Goes
- Jul 25, 2023 Using Pencil to Make Marks on Fabric - Does Graphite Affect the Vat?
- Jul 25, 2023 Under-Reduced Fructose Vat
- Jul 25, 2023 Troubleshooting a Different Vat Recipe
- Jul 25, 2023 Avoiding Sediment
- Jul 25, 2023 Indigo Vat Troubleshooting: Recipe Quantities for a Large Vat
- Jul 25, 2023 Sharpening Your Vat
- Jul 25, 2023 Stirring Your Vat
- Jul 25, 2023 Adding More Pigment to a Fresh Leaf Extraction Vat
- Jul 25, 2023 Making a Vat for Pale Dyeing
- Jul 25, 2023 Sizing Up Your Vat
- Jul 25, 2023 Indigo Vat Troubleshooting: Lye and Hydrosulfite
- Jul 25, 2023 Recipe for Pickling Lime and Fructose Vat
- Jul 25, 2023 Thoughts on Using Soda Ash and Spectralite Instead of Iron and Lime in Making a Dye Vat
- Jul 25, 2023 Giving Your Vat Enough Time to Set Up
- Jul 25, 2023 Switching Reducing Agent and pH Combo When Sharpening Your Vat
- Jul 25, 2023 Vat Temperature
- Jul 25, 2023 Precision of pH for Ferrous and Fructose Vats and Indicators of Under or Over Reduction
- Jul 25, 2023 Forms of Indigo that Work in a Ferrous Vat Recipe
- Jul 25, 2023 Indigo Vat Troubleshooting: Sludge and Sediment
- Jul 25, 2023 Indigo Vat Diagnosis: Vat Color, Flower, and pH
- Jul 25, 2023 Iron Vat Temperature
- Jul 25, 2023 Dissolving Lime in an Indigo Vat
- Jul 25, 2023 Reviving a spoiled or 'oxidized' indigo dye vat
- Jul 25, 2023 Mixing and Combining New Vat Ingredients with Old or Spent Vats
- Jul 25, 2023 Indigo Vat Mixing Temperature
- Jul 25, 2023 Weak Vat, Old Vat and Vat Health Restoration
-
PRE AND POST-DYE TREATMENTS & TIPS
- Jul 26, 2023 Preventing Crocking and Dyeing Large Fabrics Like Bedding
- Jul 26, 2023 Avoiding Fading
- Jul 26, 2023 Rinsing in Still Versus Running Water
- Jul 25, 2023 How Sediment Affects Your Dyeing and the Importance of Proper Rinsing
- Jul 25, 2023 Troubleshooting Strange Fading Patterns and Discoloration
- Jul 25, 2023 Suggestions for Uneven Coloration
- Jul 25, 2023 Fabric Drying Stiff and Crispy Post-Dyeing
- Jul 25, 2023 Indigo Post-Dye Rinse: Purposes and Options
- Jul 25, 2023 Protecting Your Indigo-Dyed Pieces From Fading: Proper Scouring and Soy Milk Treatment
- Jul 25, 2023 Sun Fading of Indigo
- Jul 20, 2023 Best Way to Dry Indigo Dye
-
QUESTIONS ABOUT OUR INDIGO & SHIBORI DYE KIT
- Jul 26, 2023 Waiting 24 Hours Between Mixing and Using Your Indigo Vat
- Jul 25, 2023 Scaling Down Vat Size
- Jul 25, 2023 How Much Fabric Will the Natural Indigo & Shibori Dye Kit Dye?
- Jul 25, 2023 Ferrous Vat Longevity
- Jul 25, 2023 Components in the Natural Indigo & Shibori Dye Kit
- Jul 25, 2023 Indigo Form in the Natural Dye Kit
- Jul 25, 2023 Indigo Kit and Dyeing Large Items
- Jul 25, 2023 Light and Pale Shades of Indigo
- Jul 25, 2023 Scent of Natural Indigo
- Jul 20, 2023 Dye Vat Capacity
-
RICE PASTE
- Jul 26, 2023 Dipping Resist Pieces
- Jul 26, 2023 Pastry Cones for Applying Rice Paste Resist
- Jul 26, 2023 Indigo Resist Screen Printing
- Jul 26, 2023 Rice Paste Resist Longevity
- Jul 26, 2023 Destabilized AKA De-Fatted Bran in Rice Paste Resist
- Jul 25, 2023 Tips for Using Rice Paste in a Ferrous Vat
- Jul 25, 2023 Rinsing Stencil Print Between Dips
-
TIPS FOR VARIOUS DYE PROJECTS
- Jul 26, 2023 Preventing Crocking and Dyeing Large Fabrics Like Bedding
- Jul 26, 2023 Using Fresh Goldenrod Leaves to Make a Paintable Dye Pigment
- Jul 26, 2023 Type of Wood for Making Block Prints
- Jul 26, 2023 Mordant Recipe: Block vs Screen Printing
- Jul 26, 2023 Making a Stamp Pad
- Jul 26, 2023 Dyeing with Fresh Plants
- Jul 26, 2023 Indigo Resist Screen Printing
- Jul 26, 2023 Destabilized AKA De-Fatted Bran in Rice Paste Resist
- Jul 25, 2023 Dipping Metal in my Vat
- Jul 25, 2023 Using Natural Indigo Paste
- Jul 25, 2023 Dyeing Vegetable Tanned Leather
- Jul 25, 2023 Tips for Using Rice Paste in a Ferrous Vat
- Jul 25, 2023 Dyeing Paper
- Jul 25, 2023 Chalk and Cheesecloth Clarification in Mordant and Block Printing
-
USING MORDANTS
- Jul 26, 2023 Mixing Mordant
- Jul 26, 2023 Mordant Recipe: Block vs Screen Printing
- Jul 26, 2023 Diluting Mordant Paste
- Jul 25, 2023 Chalk and Cheesecloth Clarification in Mordant and Block Printing
Dipping Resist Pieces
Q: Any best practices for dipping pieces with resist patterns on them?
A: Yes, here are a few:
Be very careful when dyeing and removing your pieces from the vat as any drips will begin to weaken the vat. Remove your pieces very slowly and that will minimize.
Make sure you soak your goods in cold water with a drop or two of synthropol (which helps with dye penetration) so they are nice and saturated before they go in the vat. This will allow for even dye uptake.
If you are using wax resist make sure your vat is cool enough so the wax won’t melt when you dip.
Make your vat in as tall and skinny of a container as possible so you can fully submerge your piece without it getting in the sediment.
Set your pieces onto little wire rings that fit inside your container. (i just make mine with moldable wire from the hardware store, often used for clothesline) and dip them so they never touch themselves. Always fully wet your waxed pieces in cold water with a drop or two of synthropol (which helps with dye penetration) prior to their entry into the vat. Here's a video of an impromptu ring that I made. https://www.instagram.com/p/BKq390-DAC1/?taken-by=yesgraham
Pastry Cones for Applying Rice Paste Resist
Q: I'm looking for an alternative to mulberry paper cones for applying rice paste resist to fabrics. Would pastry cones work?
A: Yes, I use pastry cones with a fine tip.
Make sure you pre-screen your dry goods before making your paste to make sure that they can fit through the size tip you’re using. I run my dry ingredients through a 110 mesh screen printing frame. Much of the bran I’ve used in the past has some very large particles that need to be separated or re-milled. I lose about 40% of the bran because the particle size is too large. I use Bob’s Red Mill stabilized rice bran.
Indigo Resist Screen Printing
Q: I have some questions about indigo resist screen printing. What type of screen do you use? What density? And what types of resist are you using? I’ve seen the rice paste recipe on your website. Do you ever screen print with other resists like mud or flour/water?
A: For indigo resist screen printing I use a 40 mesh screen, create my designs with cut vinyl (make sure you get the stickiest kind) which I place on the bottom of the screen (the print side not the ink side) and print with a traditional Japanese rice paste recipe. You can use photo-emulsion for preparing the screen but I find that it tends to get pixelated when using 40 mesh, which is why I create my designs using adhesive vinyl. You can still get incredibly crisp lines and points when working with a very open mesh.
I've tried a couple mud recipes and found the rice paste to hold up much better over repeated dips. I've never tried wheat flour/water, just the rice flour/water. Just make sure to sieve your dry ingredients through a 60+ mesh screen to ensure that they all properly fit through a 40 mesh screen when you're printing. I've found that it is hard to find rice bran that is milled fine enough.
Rice Paste Resist Longevity
Q: I have a question about your rice paste recipe. Do I need to use it immediately after I make it or can I store it in the refrigerator in a jar? And if I can store it, do I use it straight out of the fridge or do I need to heat it up?
A: I've used the paste successfully after refrigerating for up to two weeks. After that, it just tends to be less "sticky" and will ferment. I've actually used some that got moldy in the fridge and smelled fermented. I just scraped off the mold and used it. Worked great! I've anecdotally heard that it can be frozen for longer periods of time and thawed before use but I’ve never tried that.
You can use it cold straight out of the refrigerator, though the consistency seems to be more workable when it gets back up to room temperature.
The best results definitely come from fresh made paste that has been allowed to cool to room temperature.
Destabilized AKA De-Fatted Bran in Rice Paste Resist
Q: Your recipe for making rice paste resist calls for de-fatted bran. Is that the same as stabilized bran?
A: I have seen the two terms used interchangeably. All the bran does is add fluff which makes the paste spreadable. The sweet rice flower adds the sticky.
Tips for Using Rice Paste in a Ferrous Vat
Q: I am interested in making an iron vat for the first time and would like to do some stencil dyeing with rice paste. I see that you suggest rinsing the fabric after each dip but I am concerned that the rinsing will cause my rice paste to come off. Do I need to rinse between every dip? What is the purpose of rinsing?
A: I rinse between dips for a couple reasons: first, it helps to oxidize the indigo more quickly and thoroughly, second, it rinses off any sludge, sediment or flower that may be trapped on the piece or in the crevices which would act as a resist for future dips.
But you have good instinct. When stencil dyeing with rice paste, to ensure the paste does not rinse off, I generally do not rinse between dips unless my piece makes contact with the sediment at the bottom of the vat. If your piece does hit the sediment you WILL need to rinse.
Make sure you don’t crinkle/crumple your pieces to get them in the vat. Rice pasted pieces do best when dipped cleanly into the vat. Because of this, be sure to dye in a very deep vat so your fabric can hang freely in the liquid and not touch the sediment.
For dark results where you need to dip many times, stick to 2-3 dips per day so the rice paste has a chance to dry out and stay firm. I have also found that if I stick to 2-3 dips per day (only dipping once is the safest bet) I can get away with rinsing gently between dips and then giving the piece 24 hours to totally dry out before doing further dips. Rice paste stays pretty resilient as long as it does not get too hydrated which is partly why I prefer using rice paste to clay or other resists which wash off very easily. I’ve found it to be the most tenacious non-wax resist.
I should also note that while dyeing in a heated vat has superior results to dyeing in a cold vat, when dyeing rice pasted pieces a cooler temperature works better because a warm/hot vat will disintegrate the paste after a dip or two.
Rinsing Stencil Print Between Dips
Q: I am curious why it is necessary to rinse your fabric after each dip when using the iron vat? As I'll be doing a lot of stencil dyeing I am wondering if the rinsing will become an issue with the paste coming off.
A: I don’t typically rinse between dips with the paste dips because it will rinse off. However, if my piece hits the sediment in the ferrous vat, I DO rinse. Make sure you are dyeing in a very deep vat so that your fabric can hang freely in the liquid and not touch the sediment. For dark results, stick to 2-3 dips per day so the rice has a chance to dry out and stay firm. I rinse between dips for a couple reasons : first, it helps to oxidize the indigo more quickly and thoroughly, second, it rinses off any sludge, sediment or flower that may be trapped on the piece or in the crevices which would act as a resist for future dips.